Q: What can go wrong with the log splitter that causes low splitting pressure or slow/jittering movement?
A: Some common issues include an unscrewed plastic knob on the end of the lever, uneven ground or a downhill-facing log splitter, low oil level, or a bowed tank.
Q: How do I check if the plastic knob on the end of the lever is fully tightened?
A: Check visually and ensure that the knob is fully screwed in place. Refer to the demonstration link provided in the troubleshooting guide.
Q: What should I do if my log splitter is pointing downhill?
A: Ensure that the log splitter is level, or even better, pointing uphill. Double-check by raising the front of the log splitter on a wood block.
Q: How can I check if the log splitter is low on oil?
A: If you have used the log splitter regularly and have sensed a drop in performance, try raising the front of the log splitter on a block of wood and try splitting logs again. If you experience an increase in splitting performance, it’s likely that the log splitter is low on oil and requires topping up.
Q: What can go wrong with the log splitter ram?
A: There aren’t many things that can go wrong, but a few common issues include obstructions from wood splinters, dislodged plastic spacers, and obstruction from log rails.
Q: How can I check if the valve stem is in contact with the face of the lever?
A: You can check this by visually inspecting the area around the valve stem. Refer to the image of the valve stem attached to the troubleshooting guide.
Q: What should I do if the log rails obstruct the moving carriage?
A: Remove the log rails by removing the screw on either side of each log rail.
Q: What can go wrong with the log splitter that causes no motor power?
A: Some common issues include a blown fuse in the plug, a tripped RCD for the ring main, a blocked fan on the motor, and a power cable with cuts or crimped wire.
Q: What should I do if the plug fuse is blown?
A: Replace it with a working 13 AMP fuse. Also, check that the RCD for the ring main has not tripped.
Q: How do I check if the fan on the motor turns freely?
A: Unplug the log splitter from the mains and remove the black fan cover from the motor. The fan should be able to turn easily with the slightest pressure from one finger right the way around. If you feel any resistance, it’s likely there’s a blockage.
Q: What should I do if there’s a blockage in the fan?
A: Try removing the blockage and then retest the fan by turning it with one finger.
Q: What should I do if the power cable has cuts or crimped wire?
A: Replace the power cable or repair the crimped wire.
Q: What can cause a leak in the log splitter?
A: Leaks can be caused by various reasons such as damaged seals, loose fittings, or damaged hydraulic components.
Q: How can I locate the source of the leak?
A: Clean the area around the rear of the motor and the log splitter with white spirit and dry it. Dab around the general area of the leak with a kitchen towel which should pick up spots of oil from the source of the leak. It may help to operate the pump.
Q: What should I do after locating the source of the leak?
A: Take photographs of where the leak is coming from and forward them to the manufacturer’s customer service for further diagnosis and solution.
Q: How can I prevent leaks in the log splitter?
A: Regularly check and replace worn-out or damaged hydraulic components, fittings and seals. Follow the manufacturer’s instructions for the maintenance and use of the log splitter.
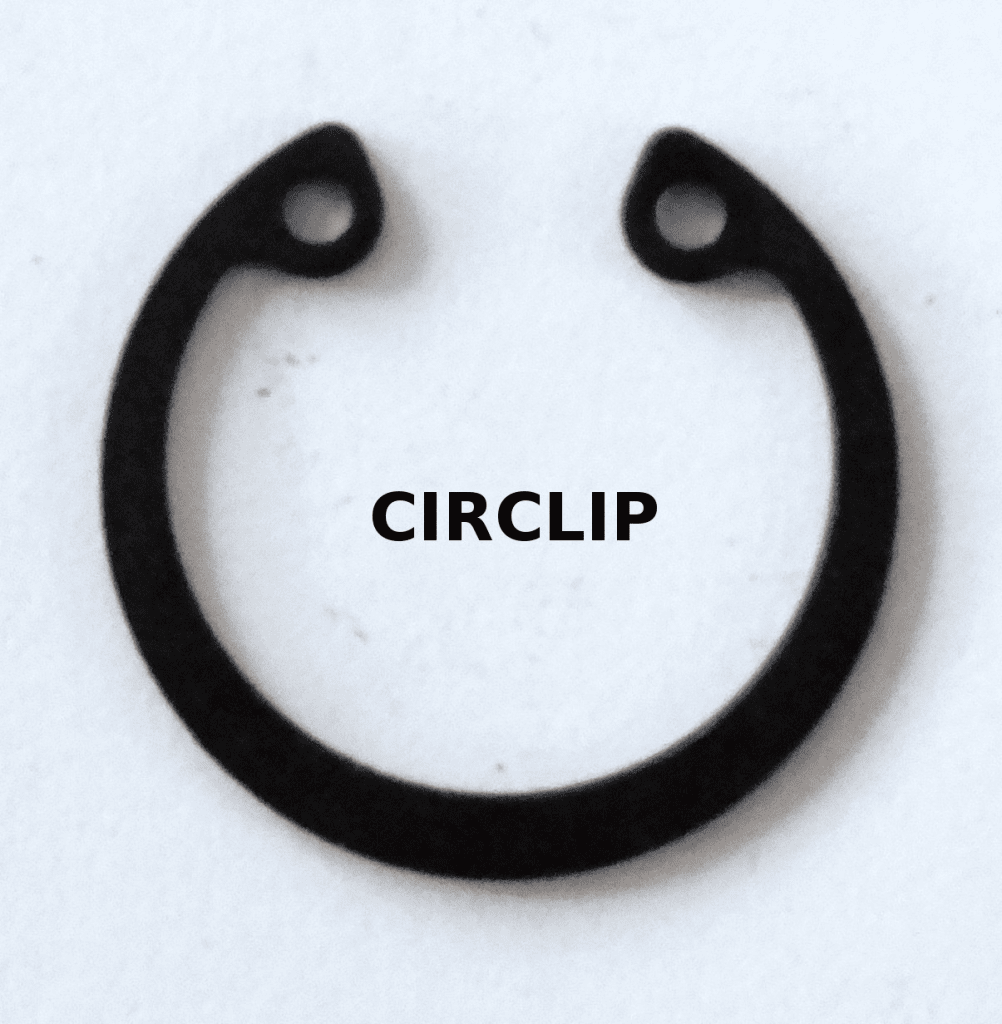
The valve base holds the valve core return spring and locates one end of the valve sleeve. The valve sleeve is located at the other end by a circlip.
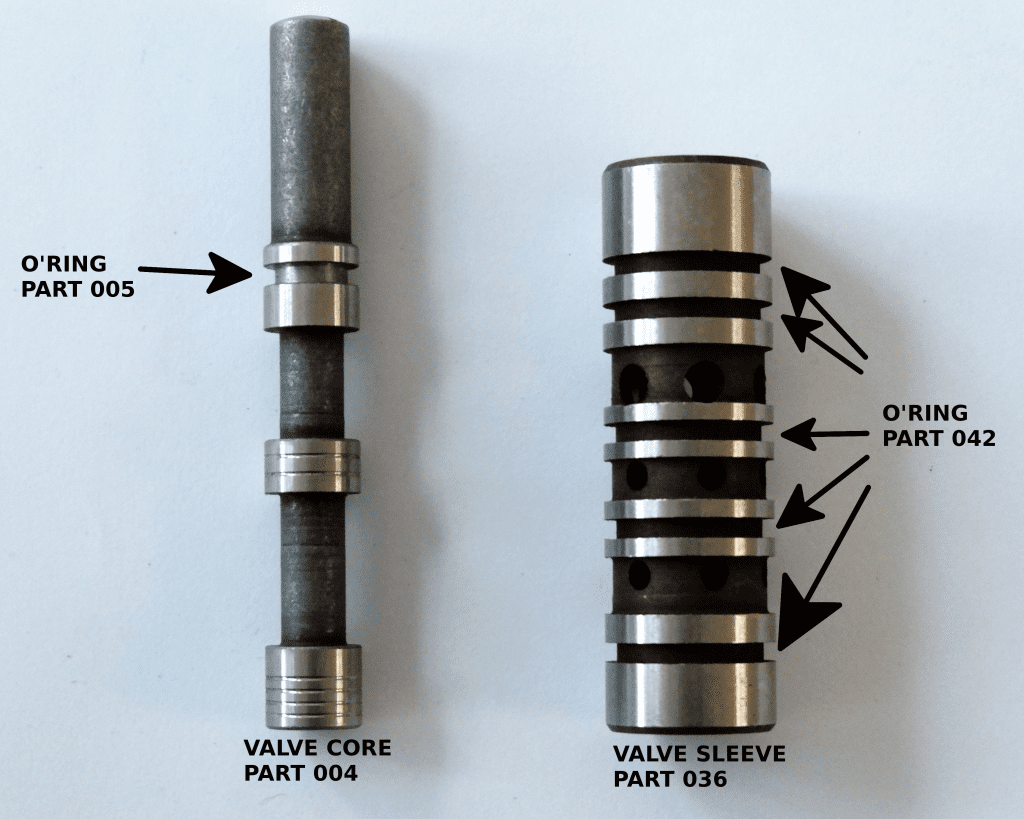
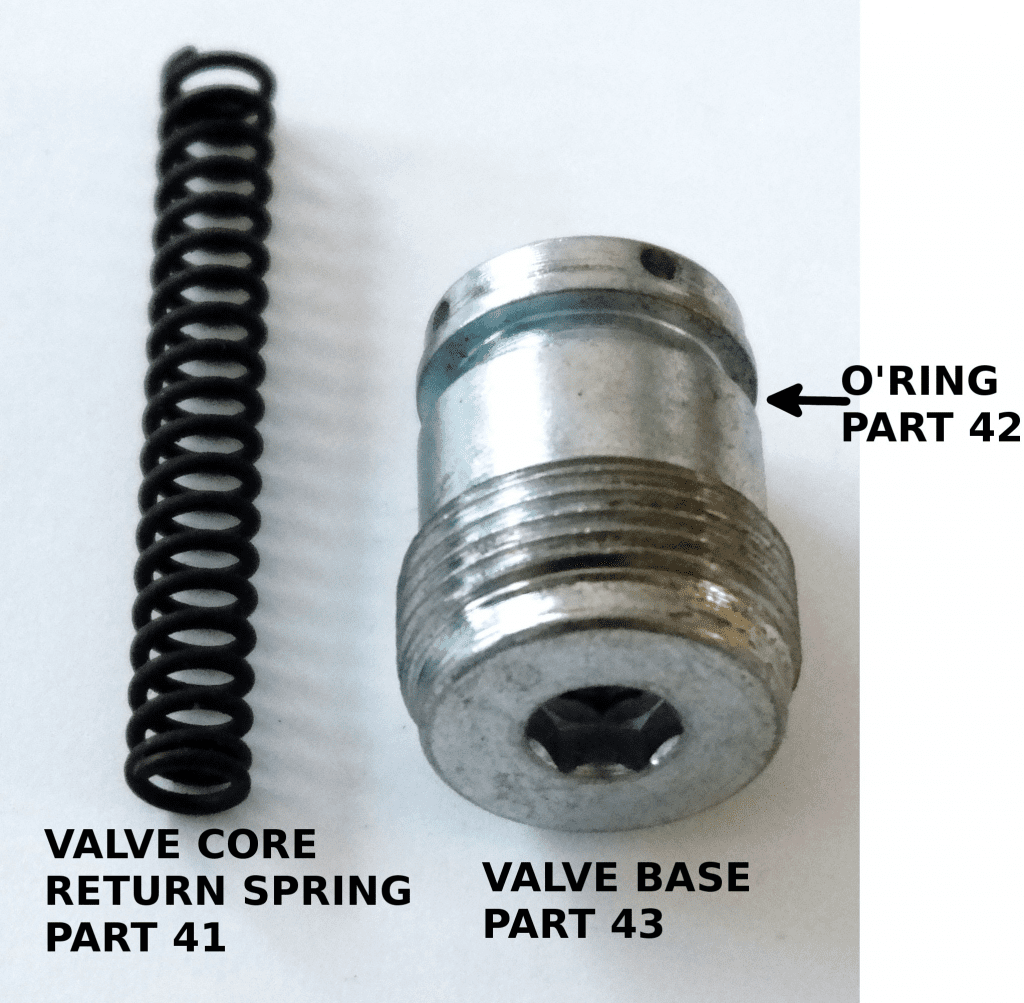
The core, sleeve and base must be fitted with the o’rings where indicated. To fir the new sleeve and core you will need to remove both log guide rails and the operating lever.
Before fitting the valve sleeve, unscrew the valve base and check that the valve core return spring is correctly sitting in the hole on the inside of the valve base.
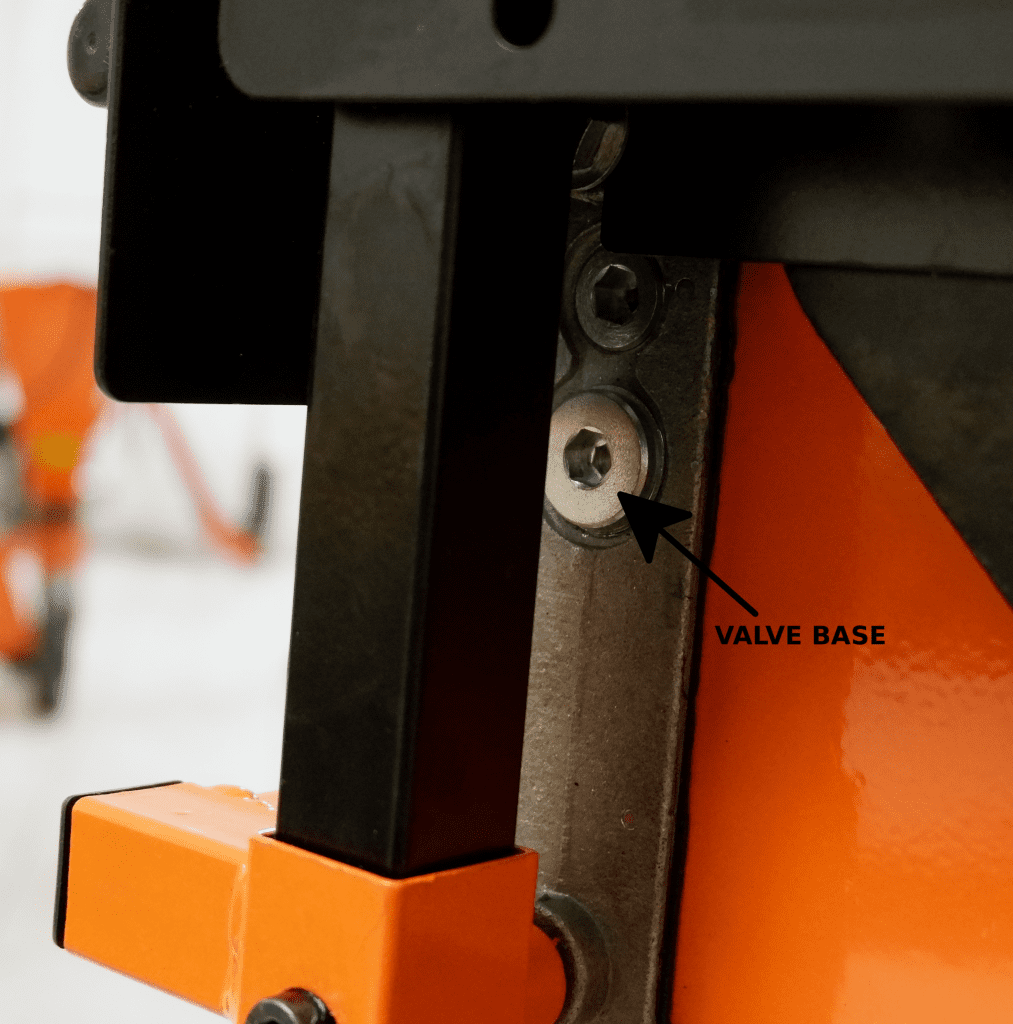
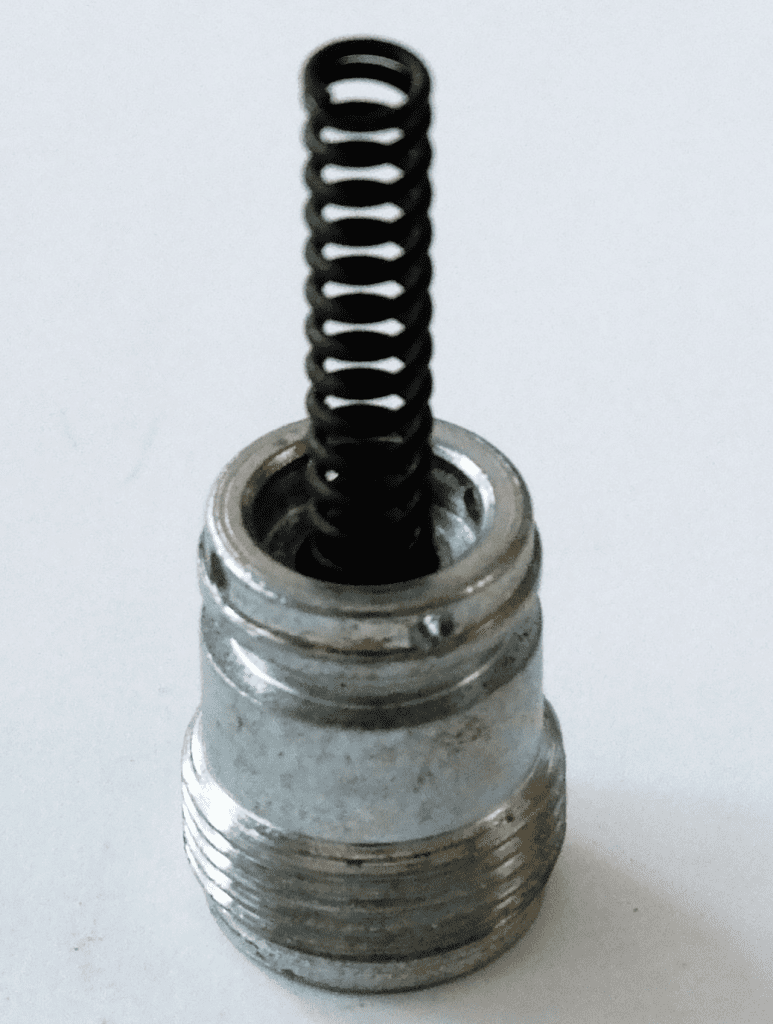
Screw the valve base and spring part-way into the endplate, do not screw it in all the way. This allows you to push the sleeve beyond the circlip groove when fitting the circlip.
Insert the valve sleeve (without the valve core) into the endplate, until it is past the circlip groove. The best way to do this is with a pair of circlip pliers but it can be achieved with a small flat-bladed screwdriver.
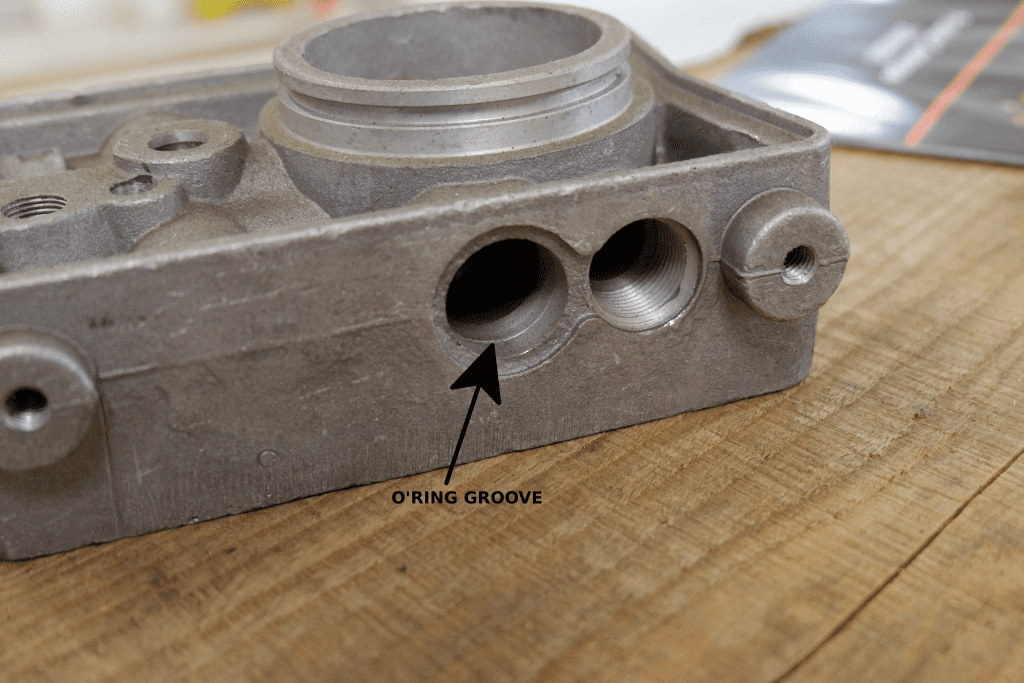
Once the circlip is correctly seated, screw the valve base fully in then insert the valve core into the valve sleeve. Refit the operating lever and secure with the nut then refit the log guides.
]]>